Home Assistant Status Lights
Last Updated: January 31, 2025
Background & History
For about 10 years now, I've been running some variant of a status light in my office. It all started in 2015 with the Luxafor Flag which I believe used to sync status with Microsoft Skype for Business. This allowed me to easily show my availability through the window in the door of my office. I used the Luxafor flag for about 2 years. It was plugged into my Mac monitor and retained it's status when I disconnected my laptop to attend meetings. Unfortunately, I had to physically plug back into the monitor to change the status.
I thought it would be really great if I could change the status of the flag remotely. Around 2018 I cobbled together a new status light from a closet tap light, an ESP8266, and a NeoPixel Ring. I used a separate Raspberry Pi as the server that received the commands and messaged the ESP8266 over wireless. This was a great system at the time. I was able to set up bookmarks in my browser to trigger the colors from my computer, IFTTT from my phone, or tap the light to cycle through the 5 color choices.
In 2024 I set up a new status light in my office at work. Visible from the exterior door to the office, it's easy to see at a glance what I'm up to. I tried an ESP8266-based solution first, but I think the security scanning that takes place on our corporate wifi network was causing it to lock up. It worked flawlessly when I tested it at home.
Current Setup
The solution I've been using for the past year has been rock solid. Here's a system diagram of everything:
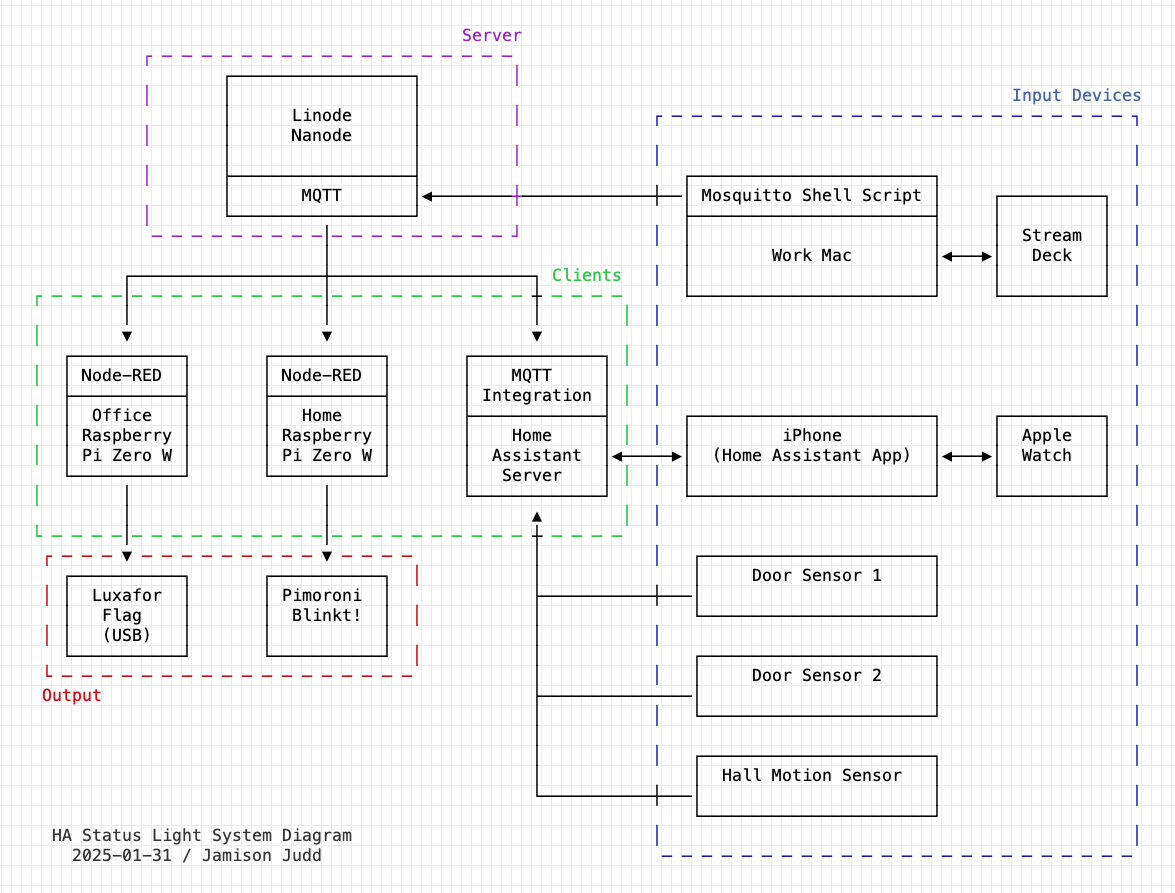
Server
I use a really lightweight Nanode server hosted on Linode for $5/mo. This server runs Mosquitto server ("broker" in MQTT-speak) and Tailscale. I'm also using Let's Encrypt to generate the SSL certificates for the server. MQTT is configured to only use SSL. Everything is firewalled off, and only encrypted SSL is open (port 8883).Clients
Office Light
Overview
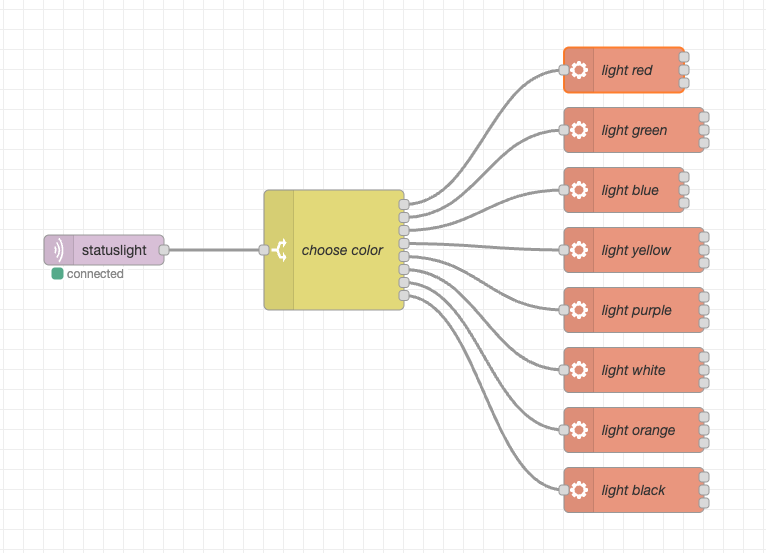
The client Raspberry Pi connects to the server through Tailscale via secure MQTT. Node-RED listens to the statuslight topic. When topics matching a color message are published, it executes a shell script to run a Python script to change the flag to the appropriate color.
Details
The office light is run off a Raspberry Pi Zero W with a USB Luxafor flag (circa 2015). I'd recommend going with the latest Raspberry Pi Zero 2 W.
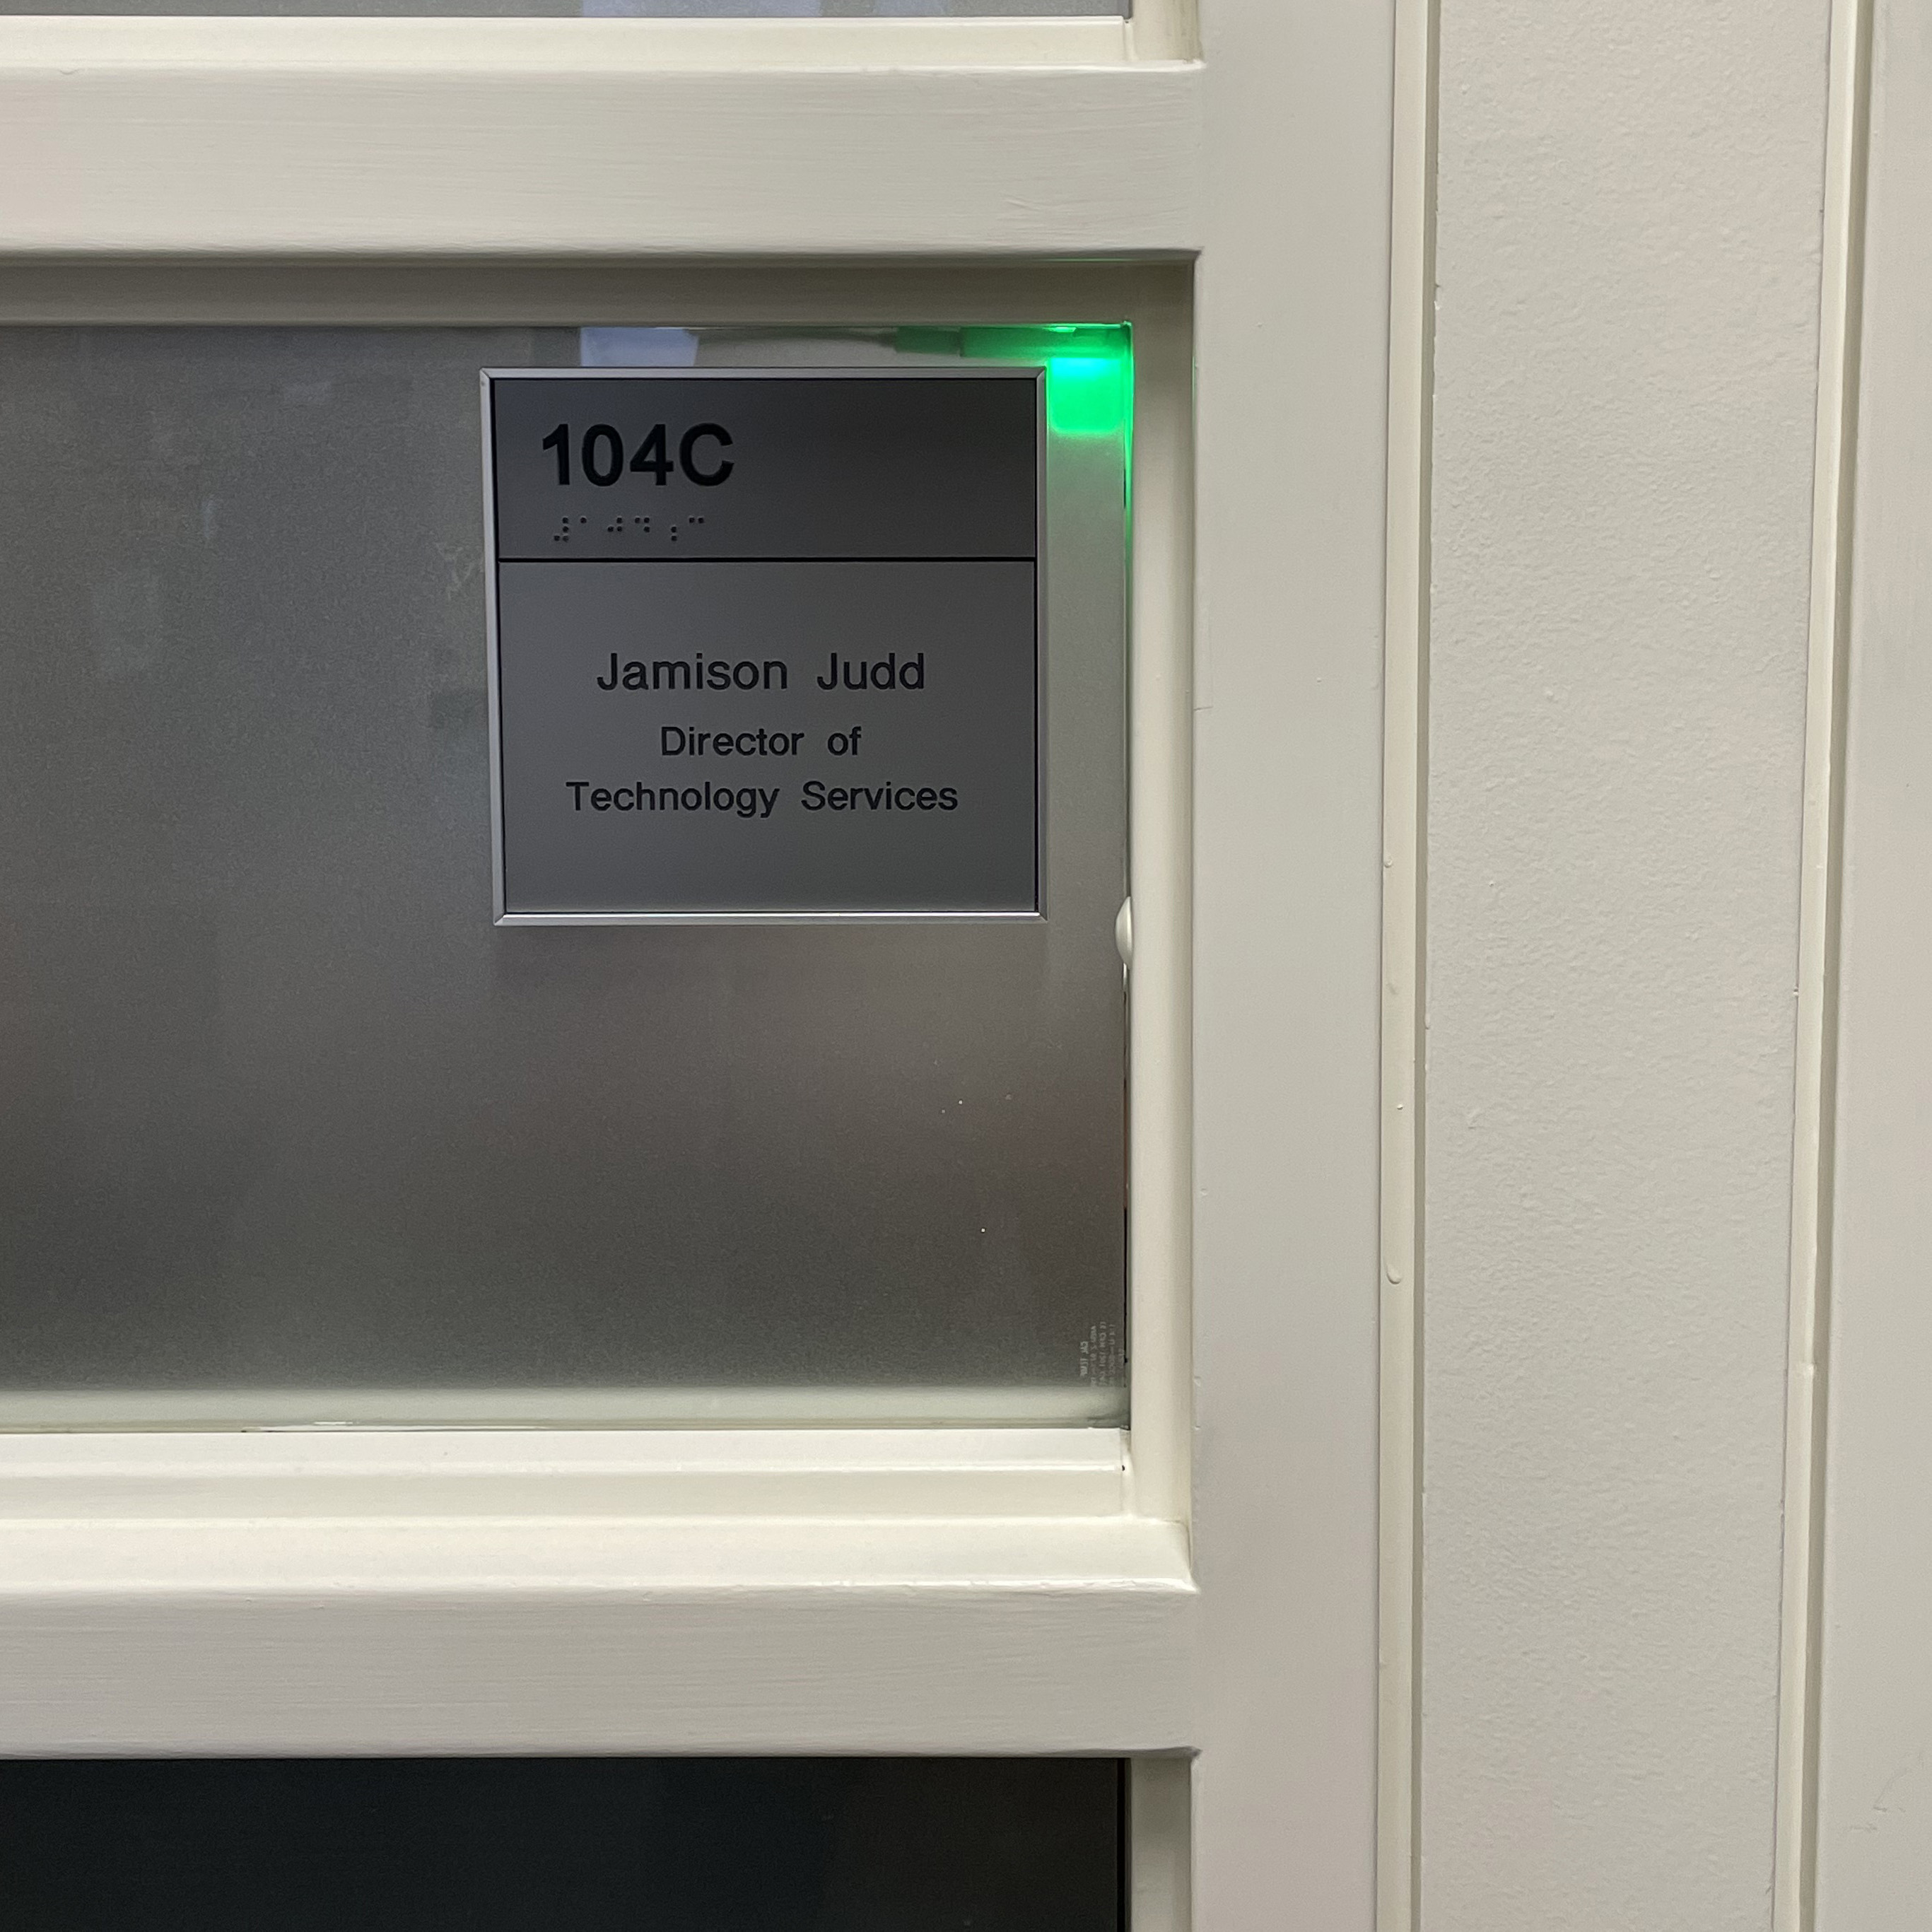 Exterior view of light |
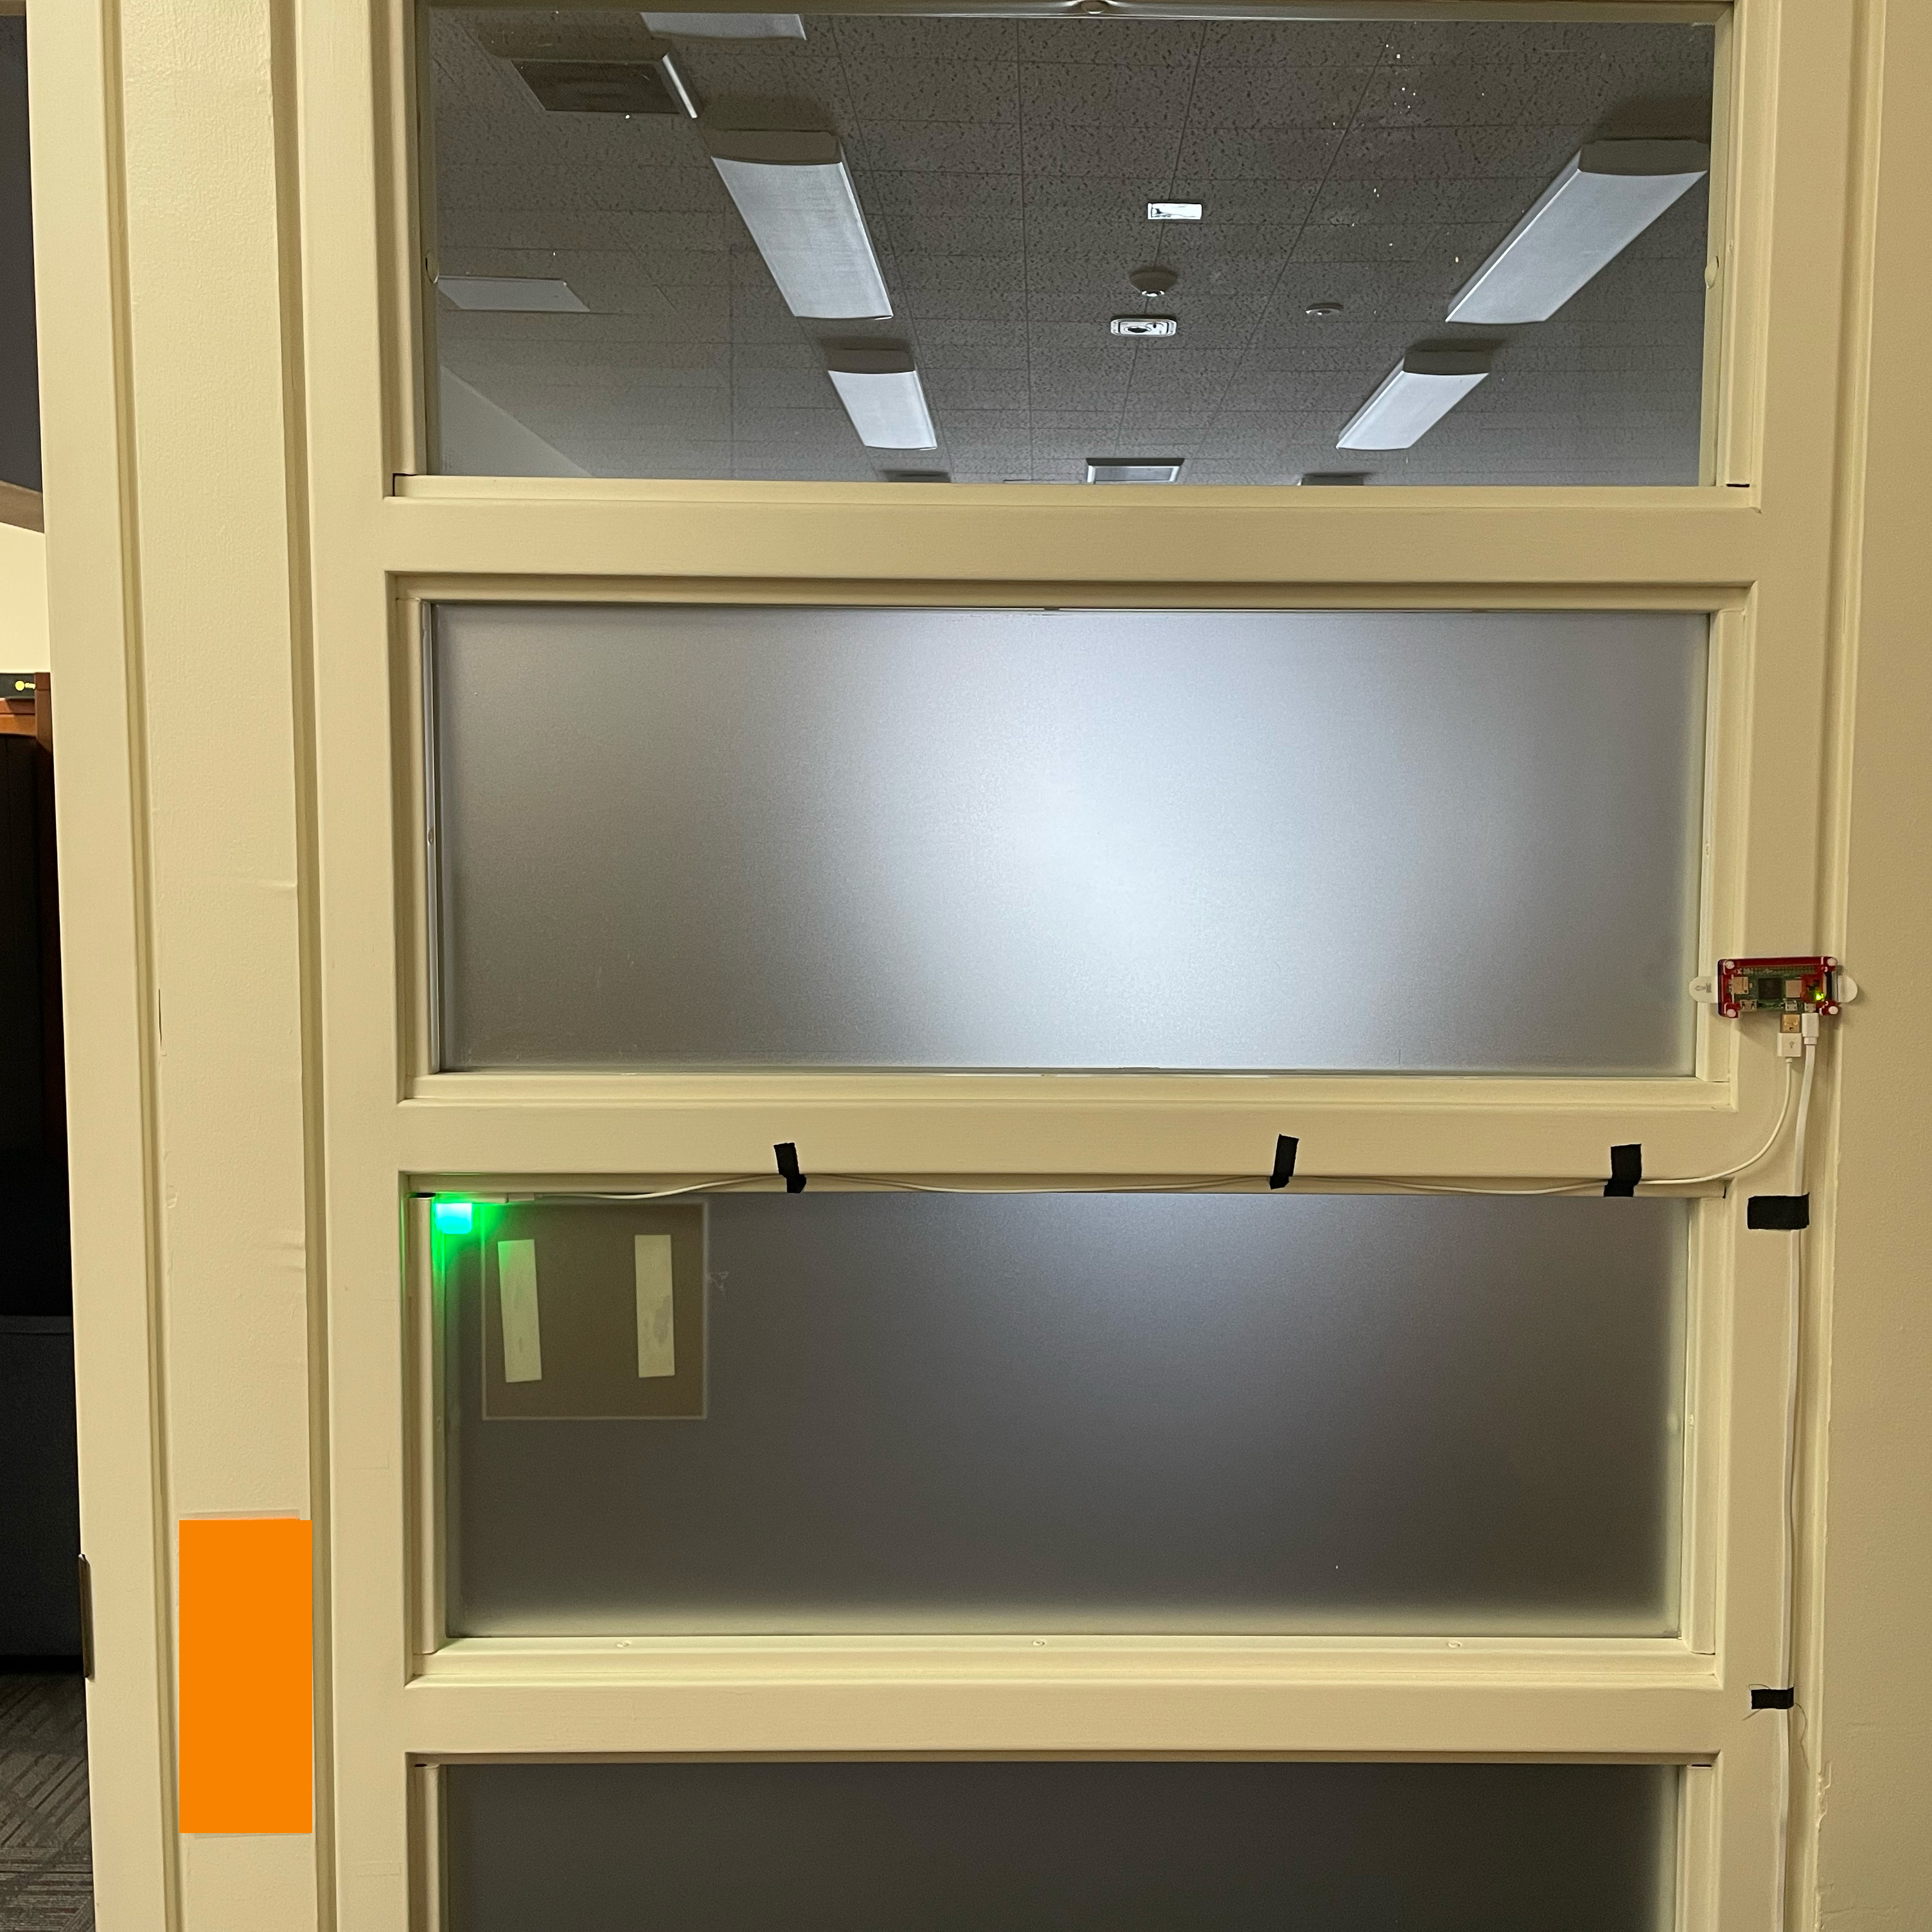 Interior view of light Interior view of light |
The software on the office light consists of the Mosquitto client, Node-RED, and various scripts triggered to change the color of the Luxafor Flag through a Python script
Example shell script for turning the Luxafor Flag red:
#!/bin/bash

# change the color on the flag using luxafor-linux script
# RED       = ff0000
# GREEN     = 00ff00
# BLUE      = 0000ff
# YELLOW    = ffff00
# WHITE     = ffffff
# PURPLE    = ff00ff
# ORANGE    = cc3300
# BLACK     = 000000

python3 luxafor-linux.py color -x "#0000ff"
Home Light
The home light (a.k.a. Kids Status Light) is set up very similar to the office light, the main difference being that the Blinkt! hat has 8 individually accessible LEDs. This light is set up in the bedroom to alert us if the kids are up and about at night.
Home Assistant Server
Install the MQTT Integration into Home Assistant to allow it to talk with the MQTT server. Once that connection is made, you can use scripting inside Home Assistant to send messages over MQTT, or trigger actions by watching for messages in an MQTT topic.
Input Devices
For the Office Light: Mac, iPhone, Apple Watch
I've got lots of options to trigger my office light: keyboard shortcut from my laptop when it's undocked. A Stream Deck for when I'm at my desk. My watch or my phone if I'm mobile. The laptop and Stream Deck are just running a shell script to push an appropriate color message to the topic via the Mosquitto client. My iPhone and Apple Watch are using Home Assistant automations set to publish a color message to the MQTT topic.
Anywhere I change the status light from, it updates to the correct color within 1-2 seconds.
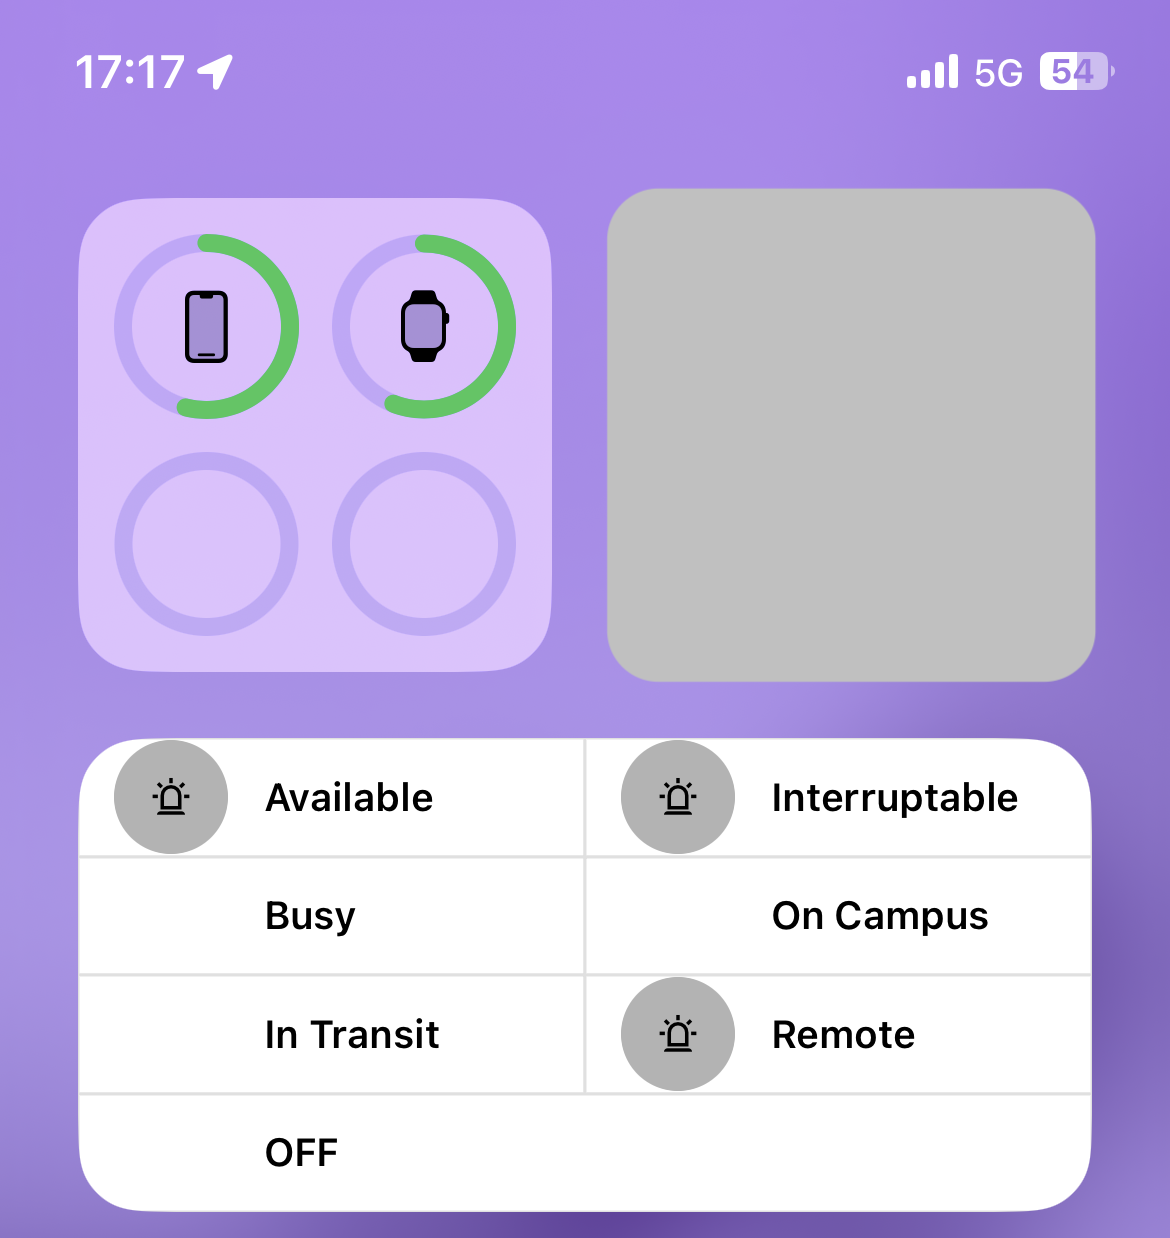 iPhone Intefrace |
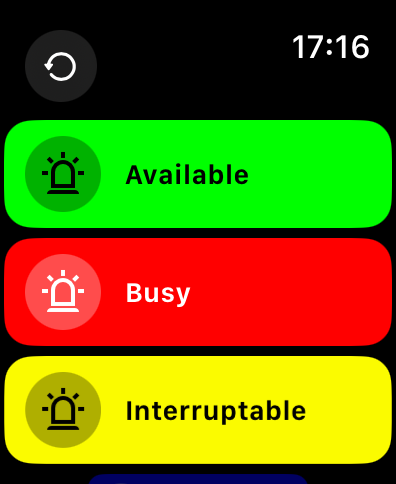 Apple Watch HA Interface Apple Watch HA Interface |
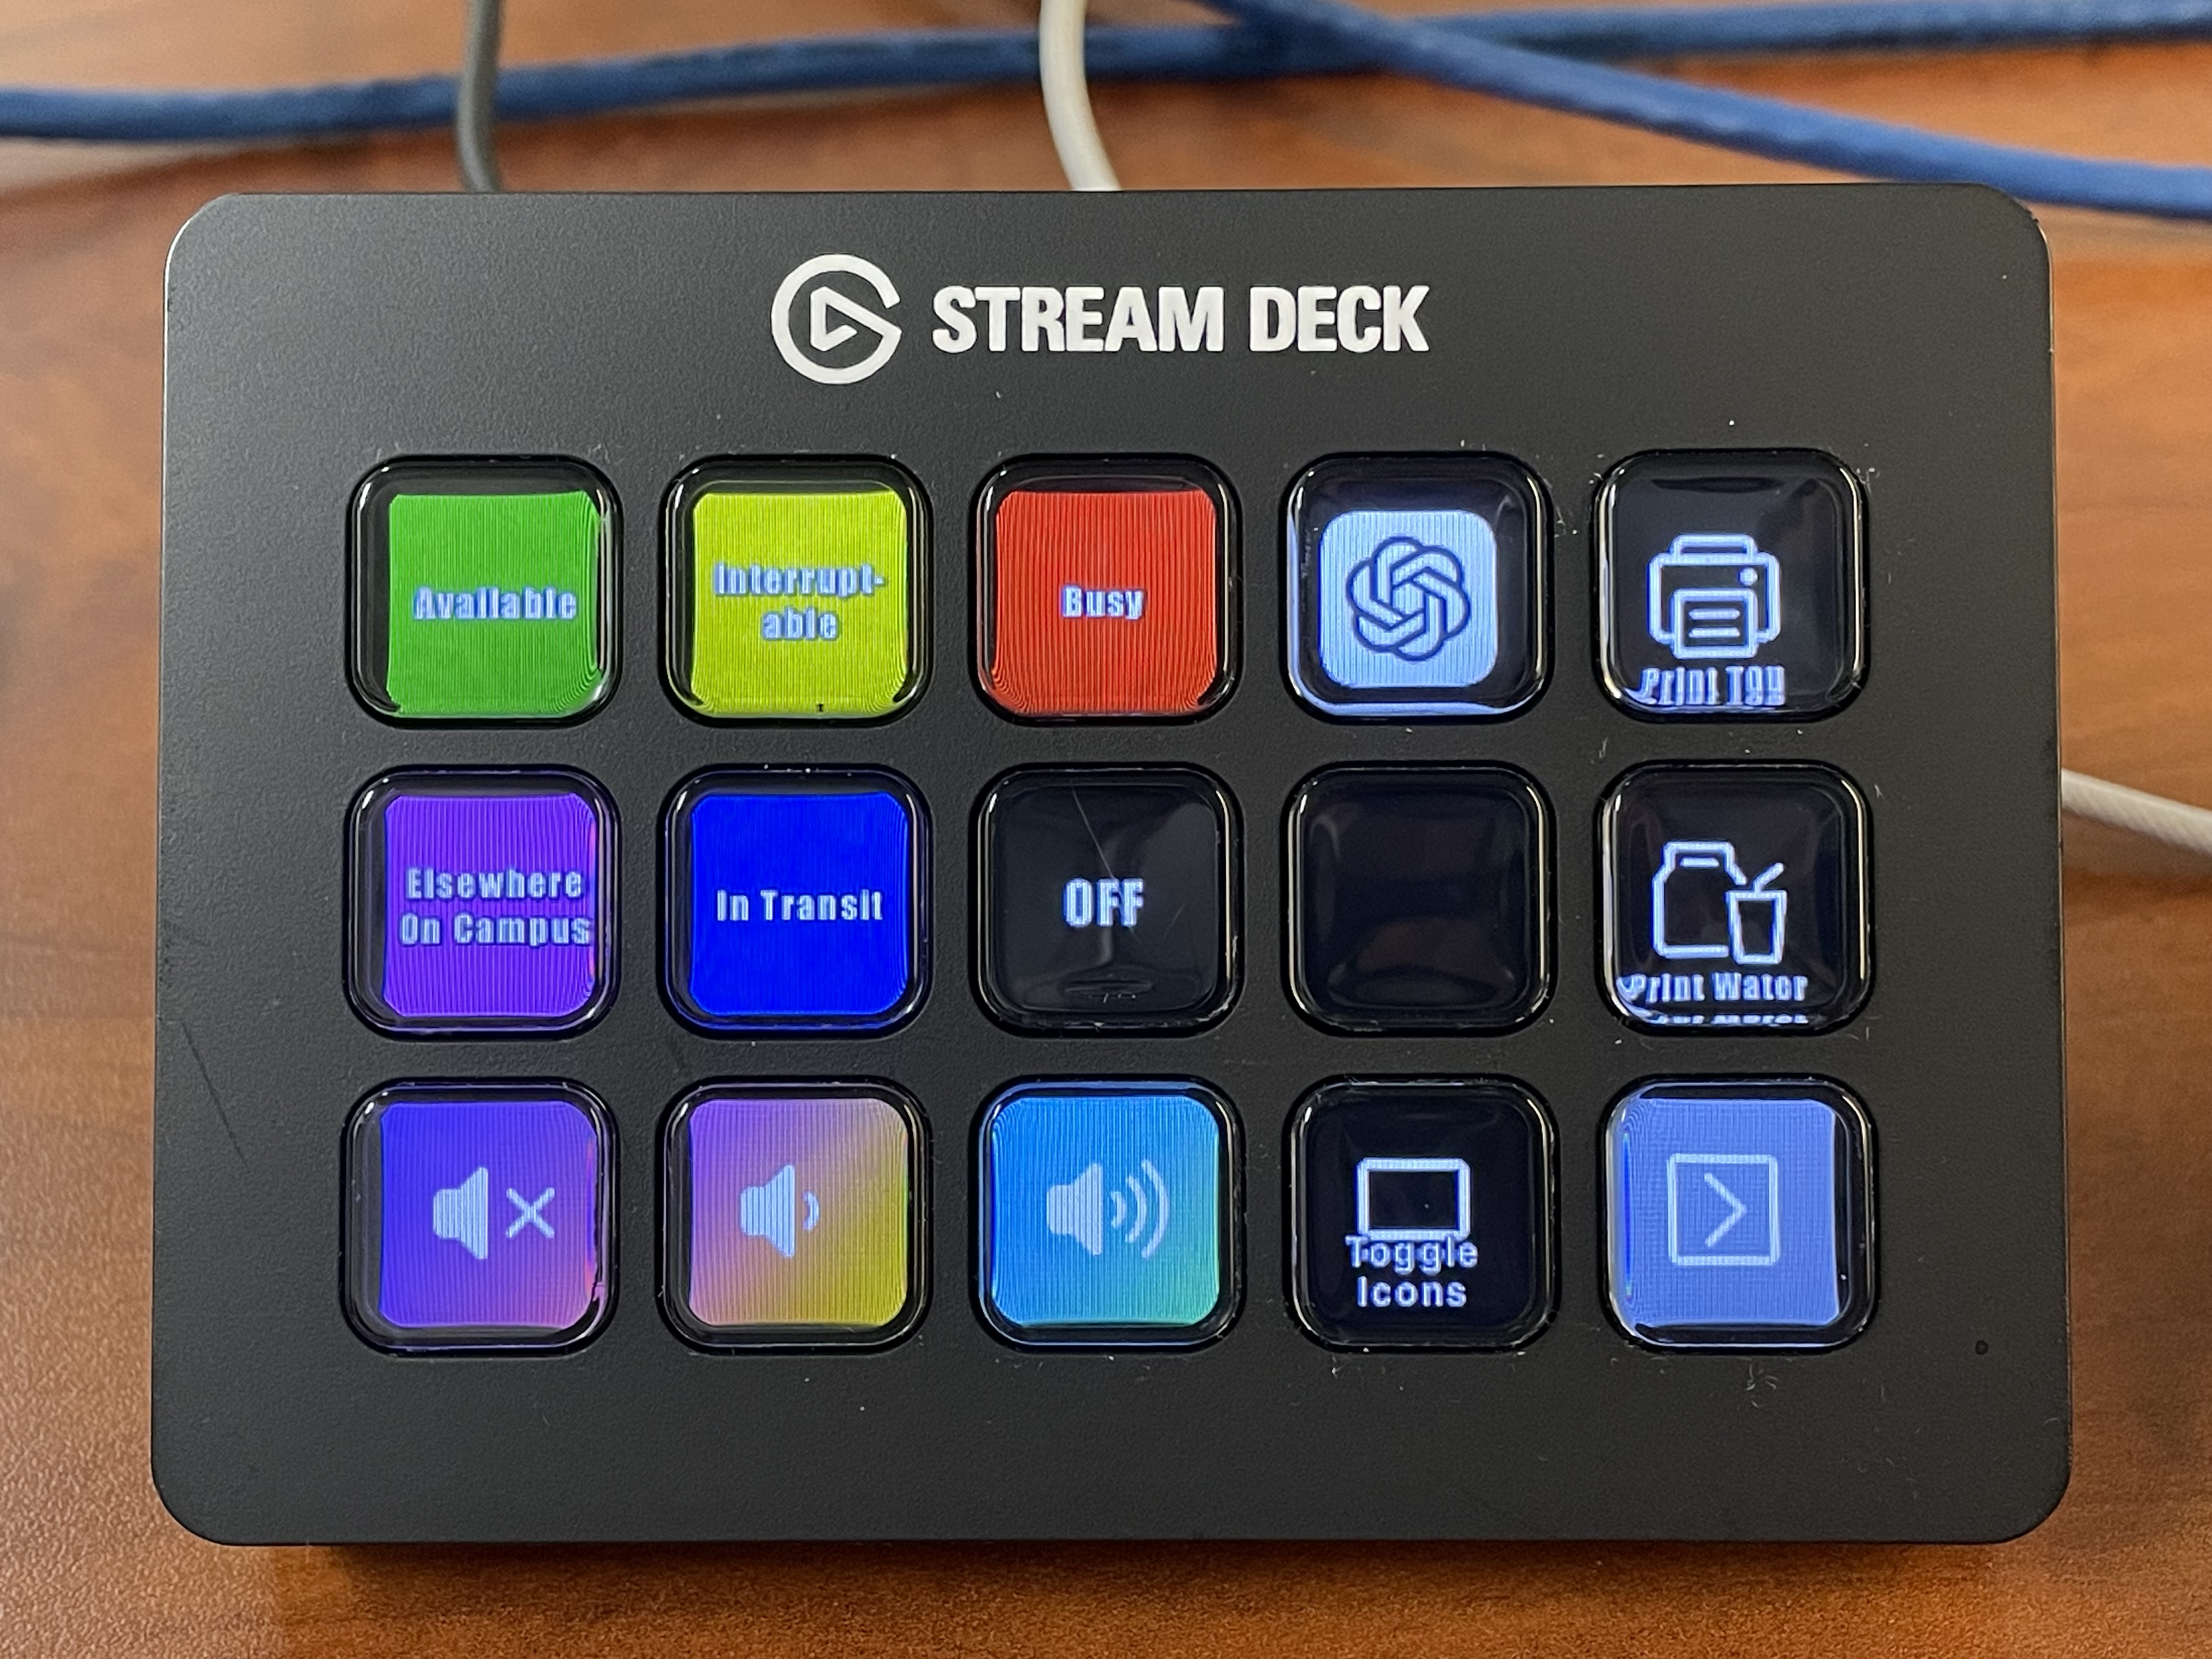 Stream Deck (pardon the dust) |
For the Kids Status Light
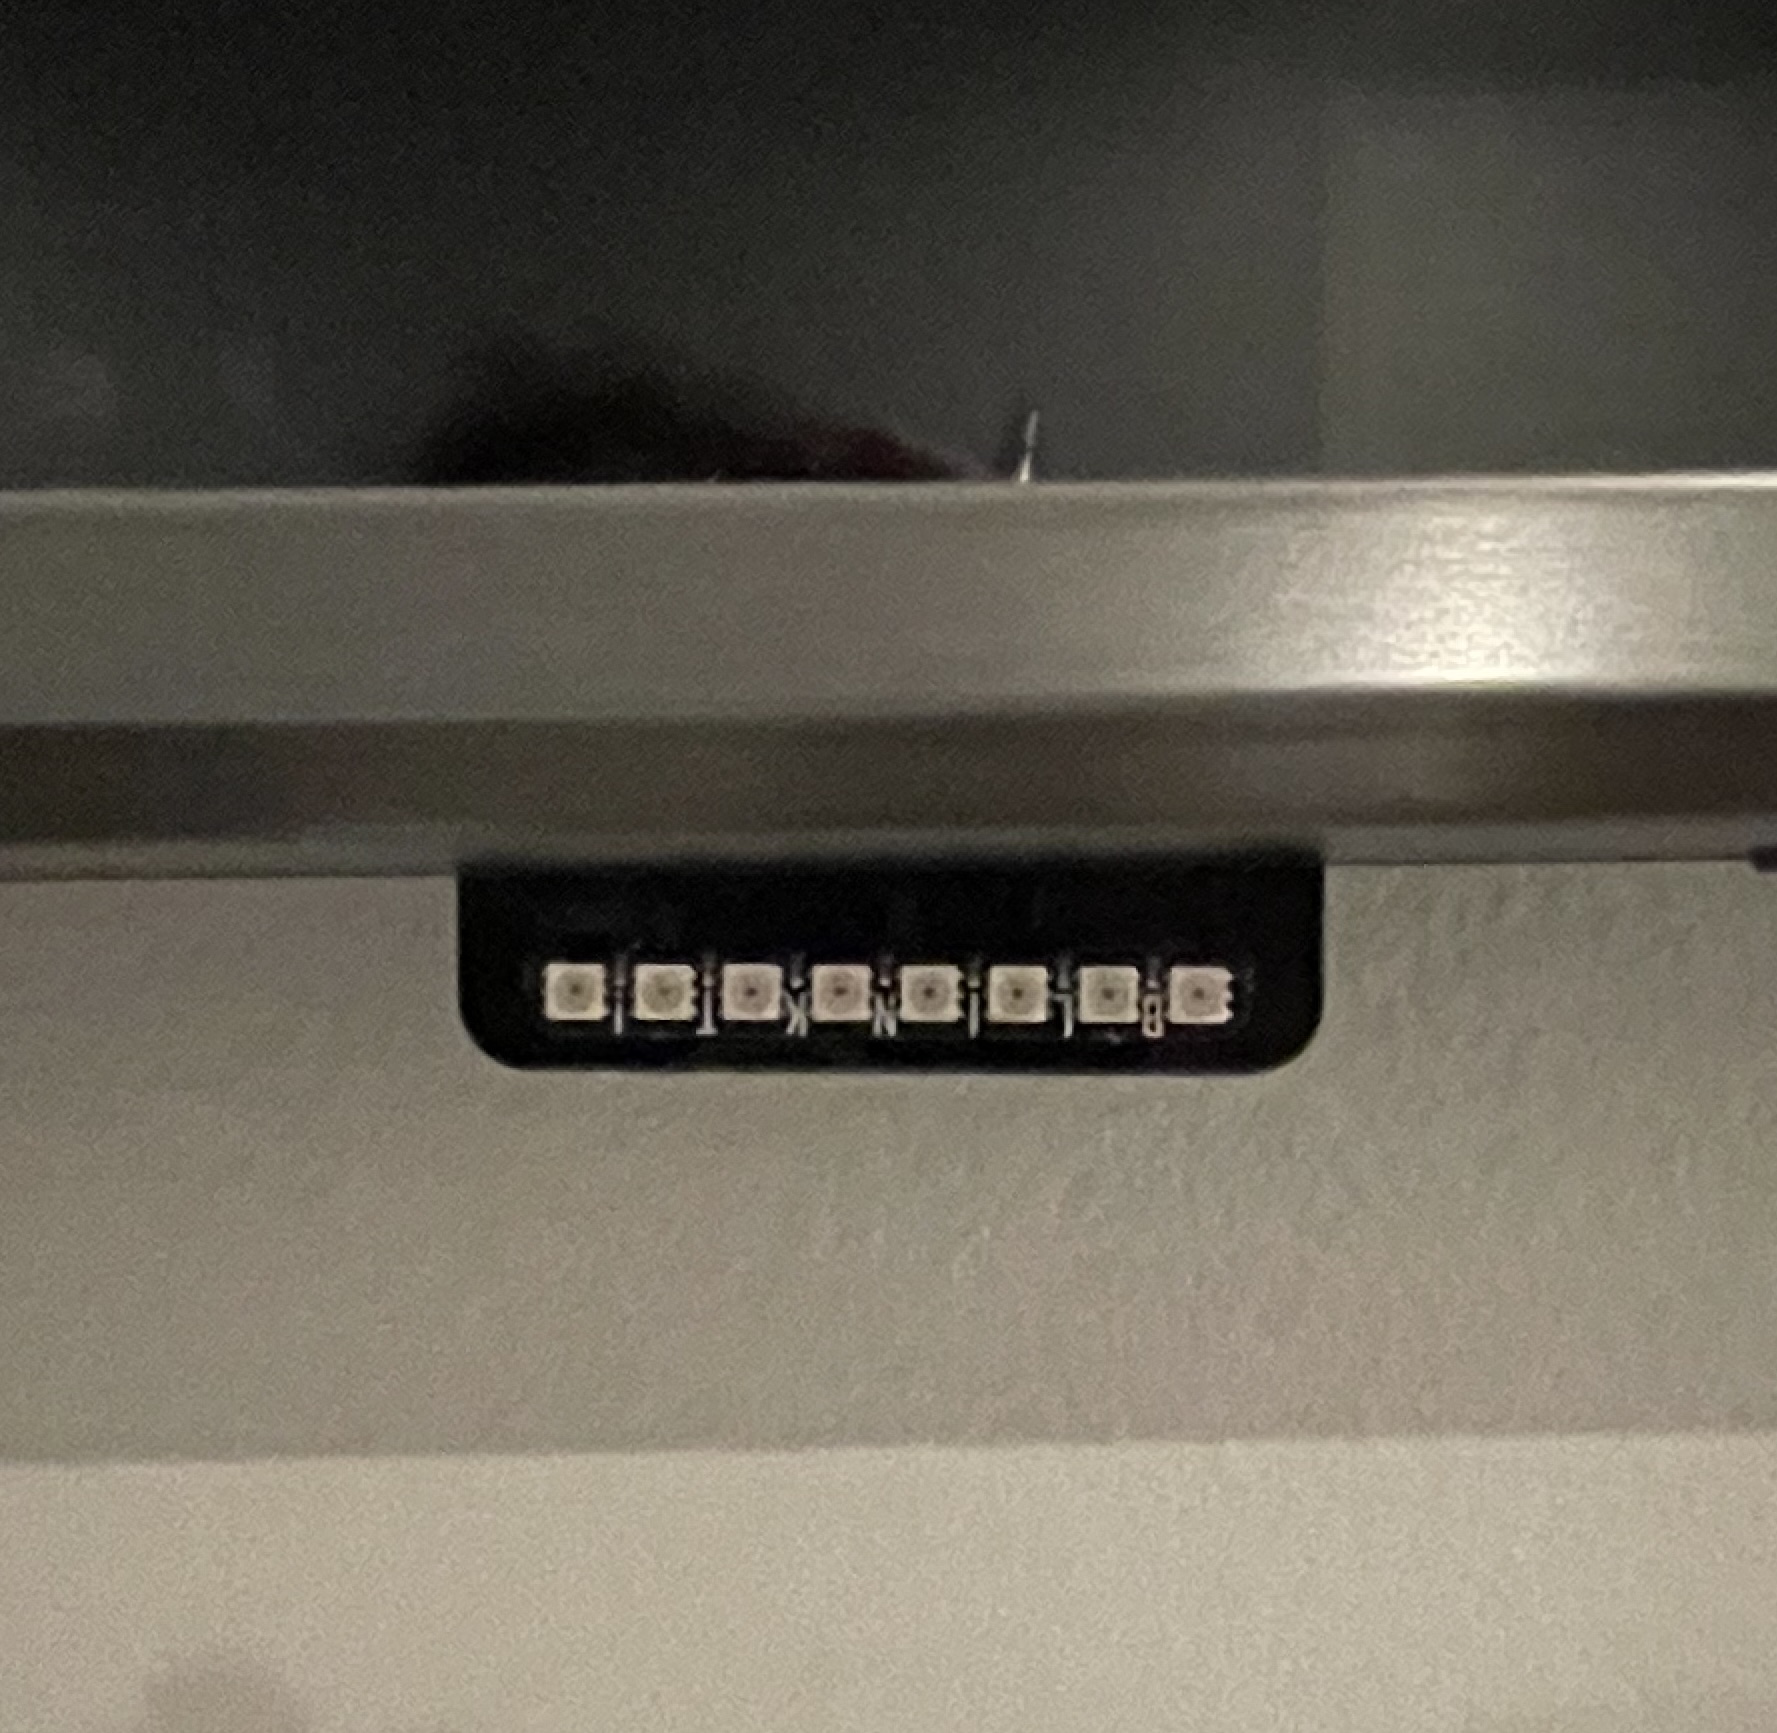
This light is quite a bit more complicated. It's fed from three inputs (two door sensors and a motion sensor) over Zigbee. I did quite a bit of thinking about how I wanted this one to operate as it's located in a bedroom and I didn't want the lights to disturb sleep. The light is mounted against the back of the TV so the LED strip is barely showing, and it's powered off the USB port in the back of the TV (simplifying the wires).
I divided the 8 LEDs into three sections that align spatially with the kids bedrooms. My son's room is farthest away and thus on the left (assigned to the 2 left LEDs). My daughter's room is closest (assigned to the right 2 LEDs). The center 4 LEDs represent the status of the motion sensor. The LEDs are also color coded (blue for boy, white for motion sensor, red for girl).
 Kids Light - all off |
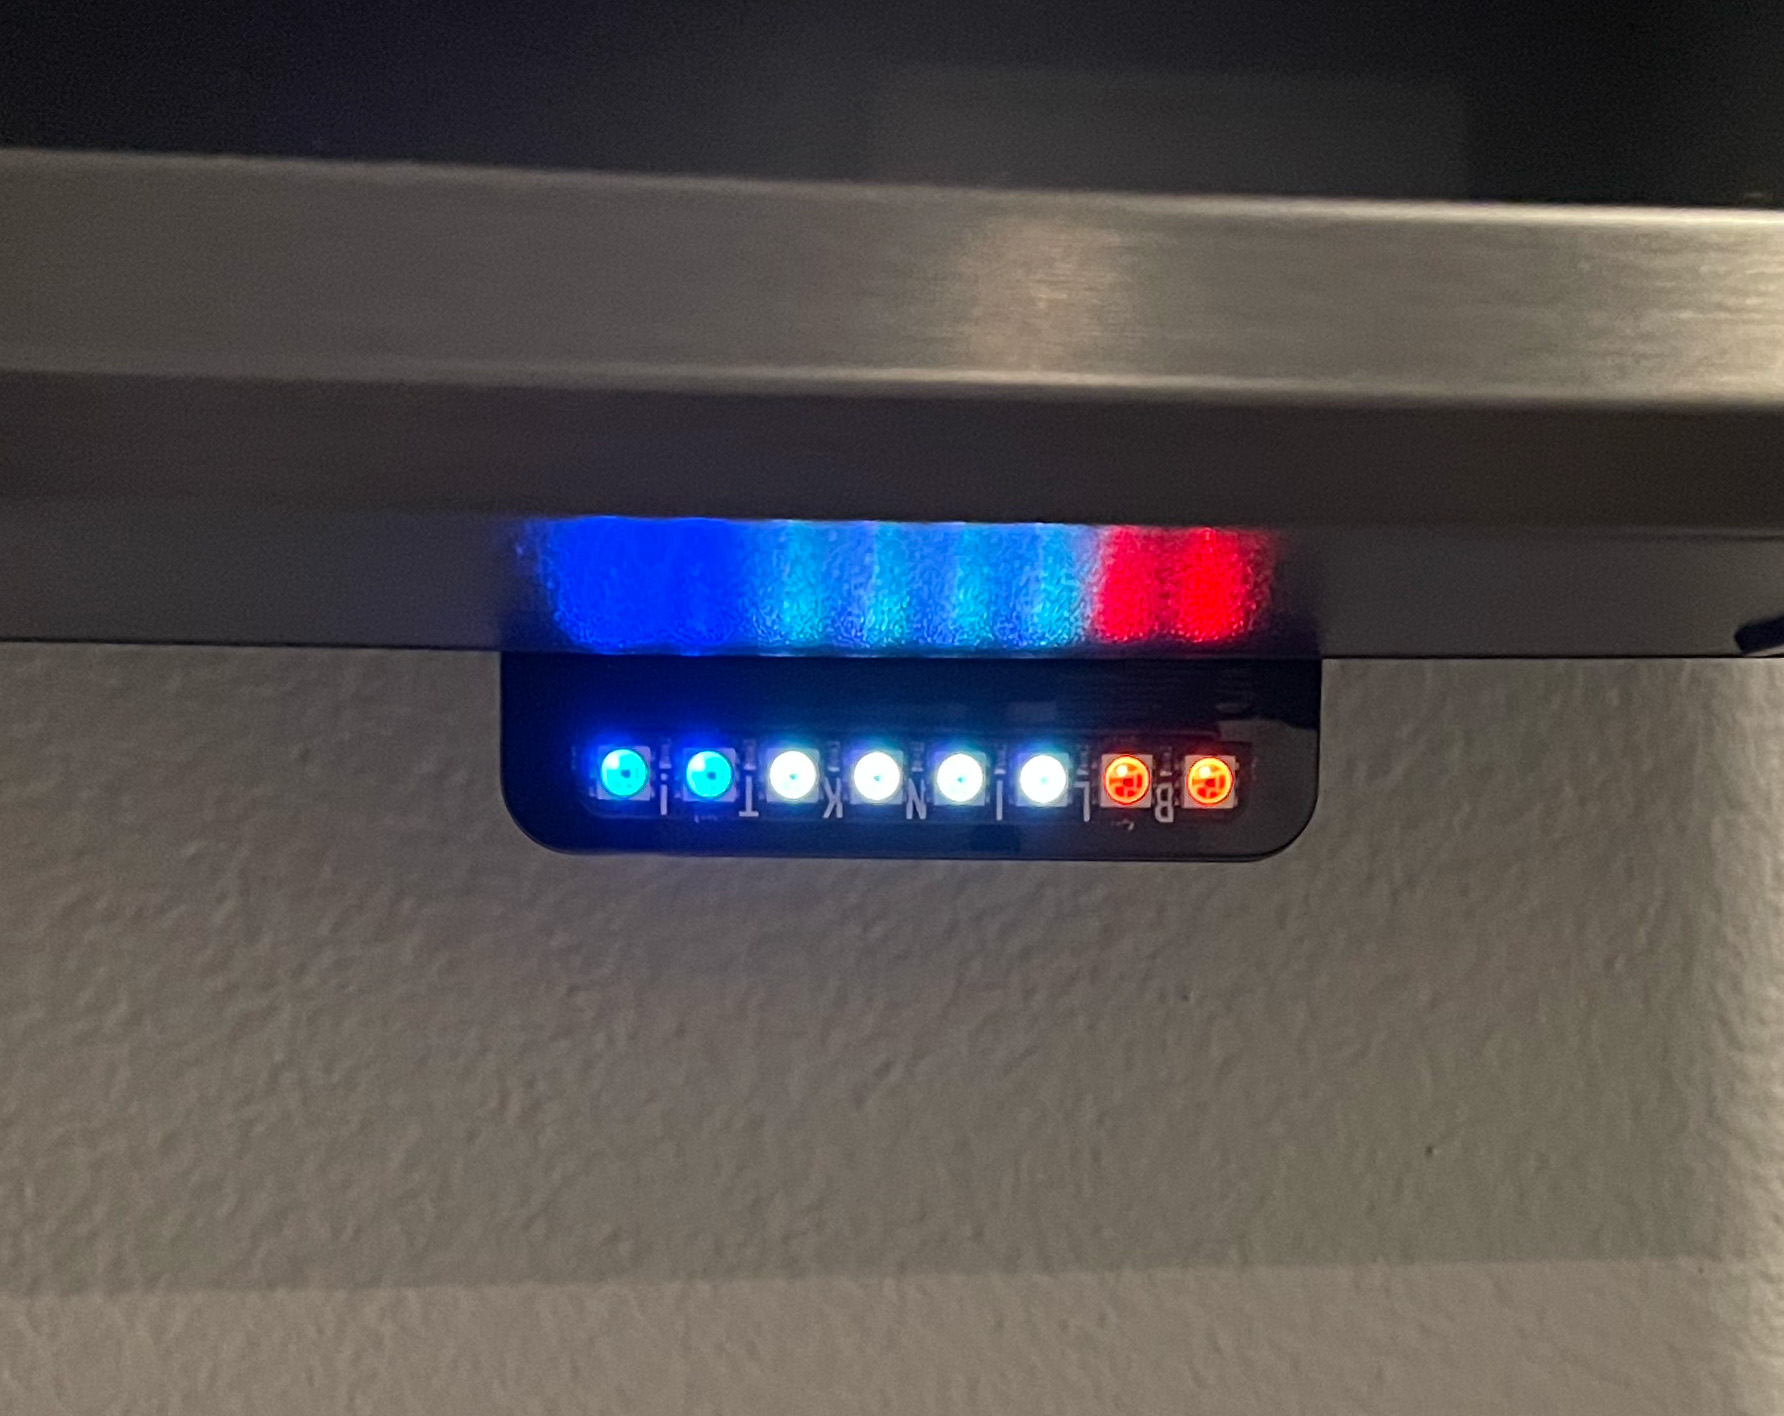 Kids Light - all on Kids Light - all on |
When everything is in the "normal" state, all the lights are off. So, if both the doors are closed and there is no motion, all the lights are off. The motion sensor clears after about 1 minute of inactivity. This all-off condition is ideal for night as it won't disturb sleep. It also makes it easy in that any lit indicator means that something is outside the normal condition. I also tuned the brightness of the LED hat so that it's just bright enough to be visible during the day, but no blindingly bright at night.
In Home Assistant, I also added a toggle to be able to enable or disable the status light as a whole, or just the door sensors. In the summer the house cools more evenly when the bedroom doors are left open.
I built a state table for the three binary inputs and used that to pass a single integer to set the light via an automation in Home Assistant.States List ( Boy | Motion | Girl ) 0 = 000 -- all off 1 = 001 -- Girl only 2 = 010 -- Motion only 3 = 011 -- Motion and Girl 4 = 100 -- Boy only 5 = 101 -- Boy and Girl 6 = 110 -- Boy and Motion 7 = 111 -- all on 9 = Override enabled
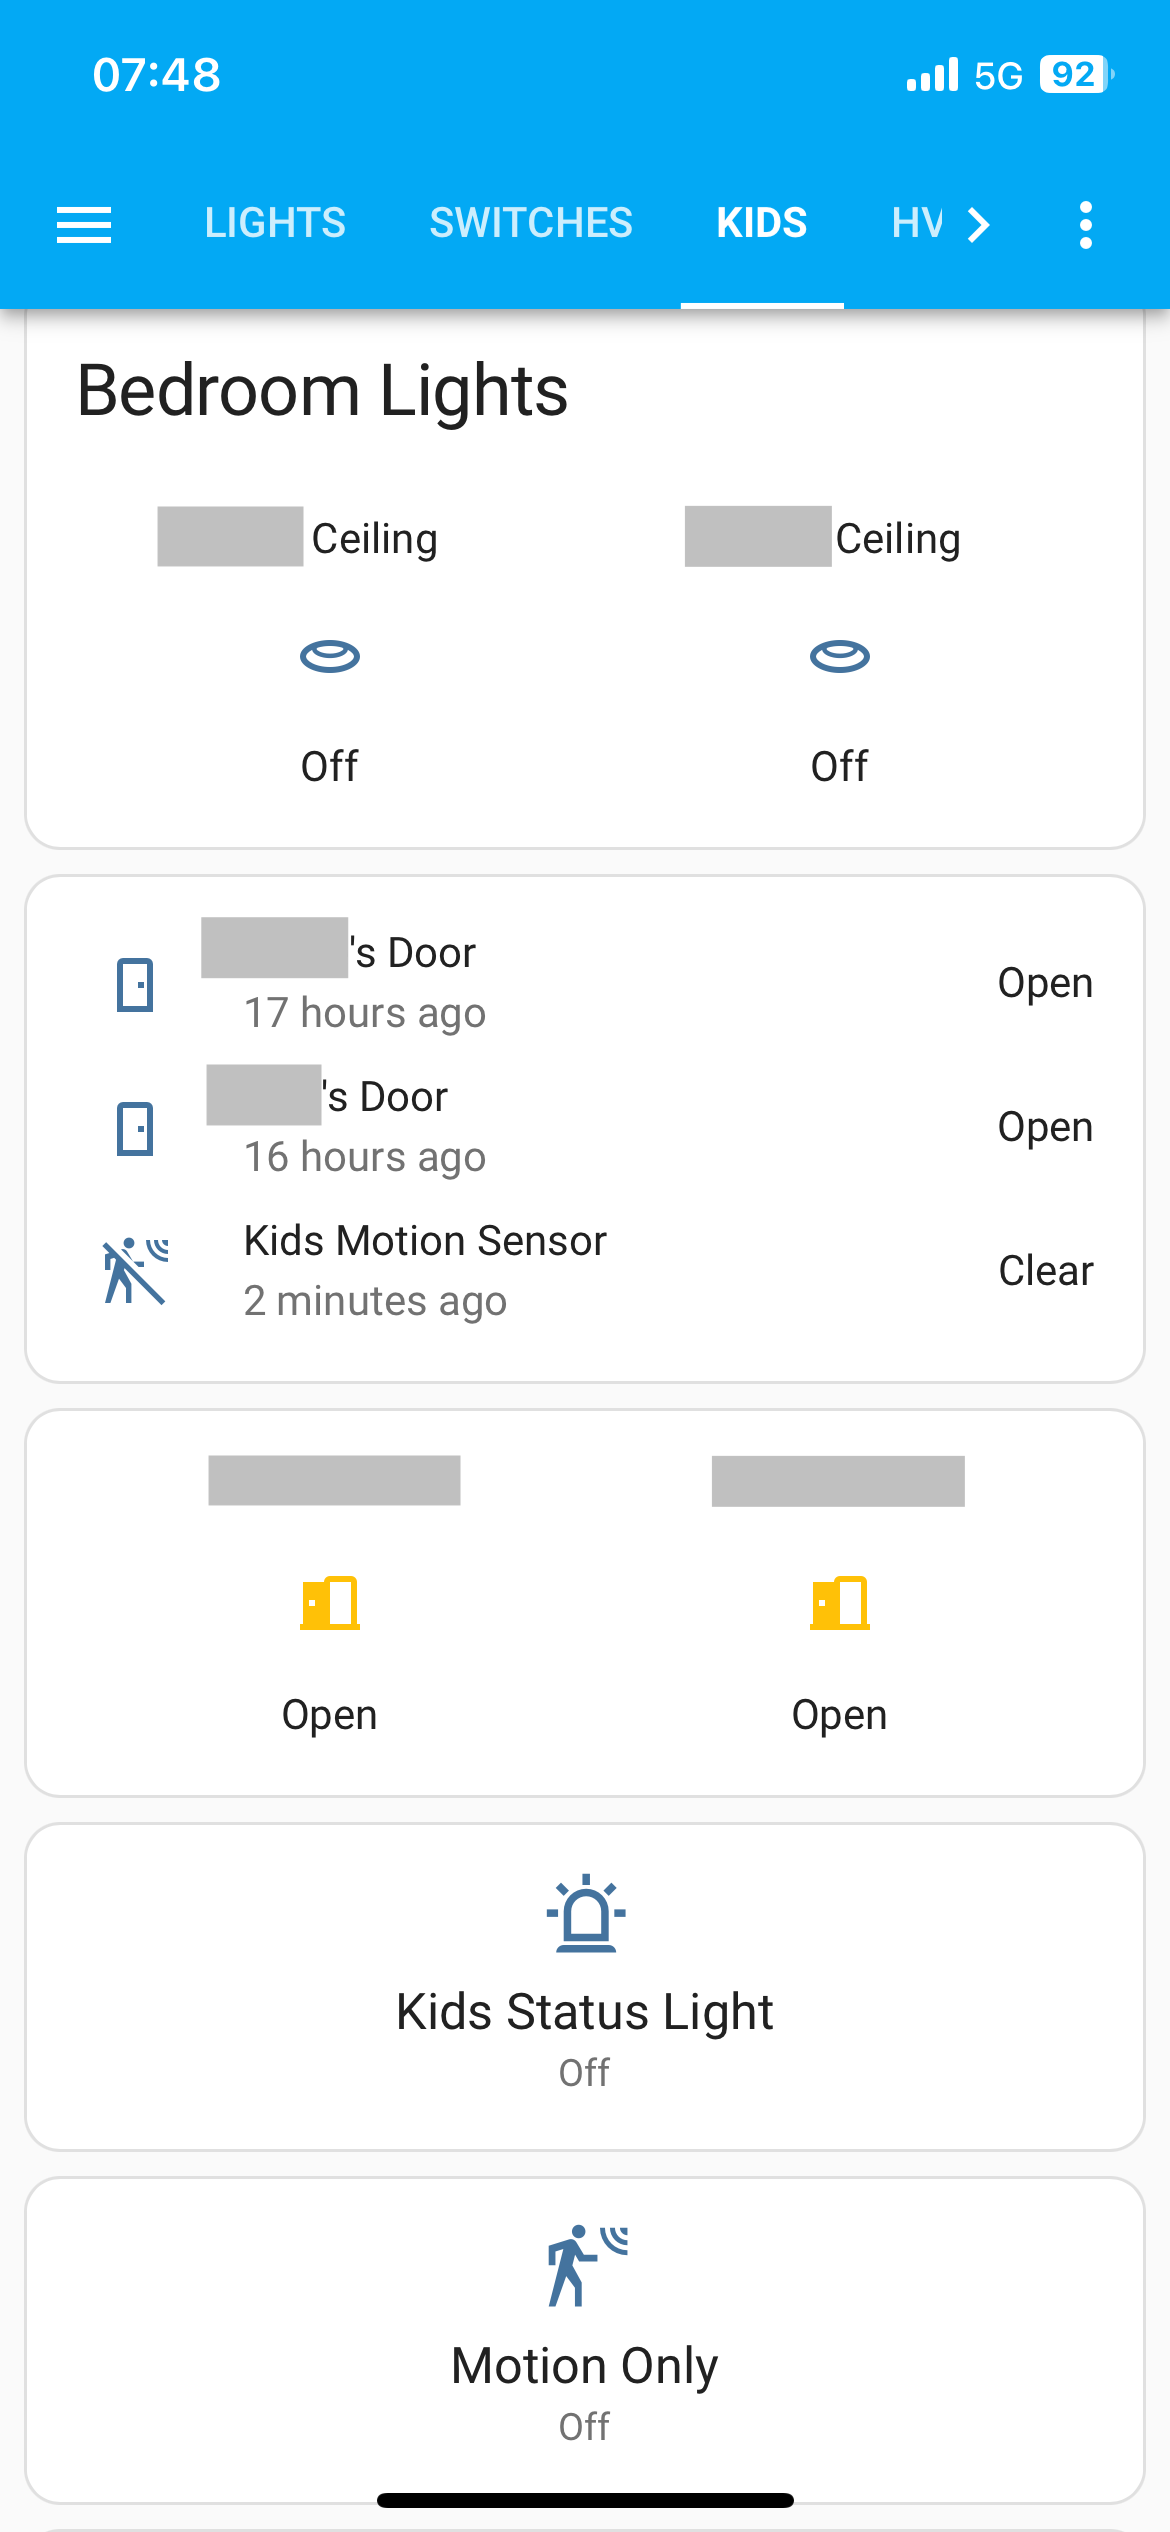 Kids Light Dashboard |
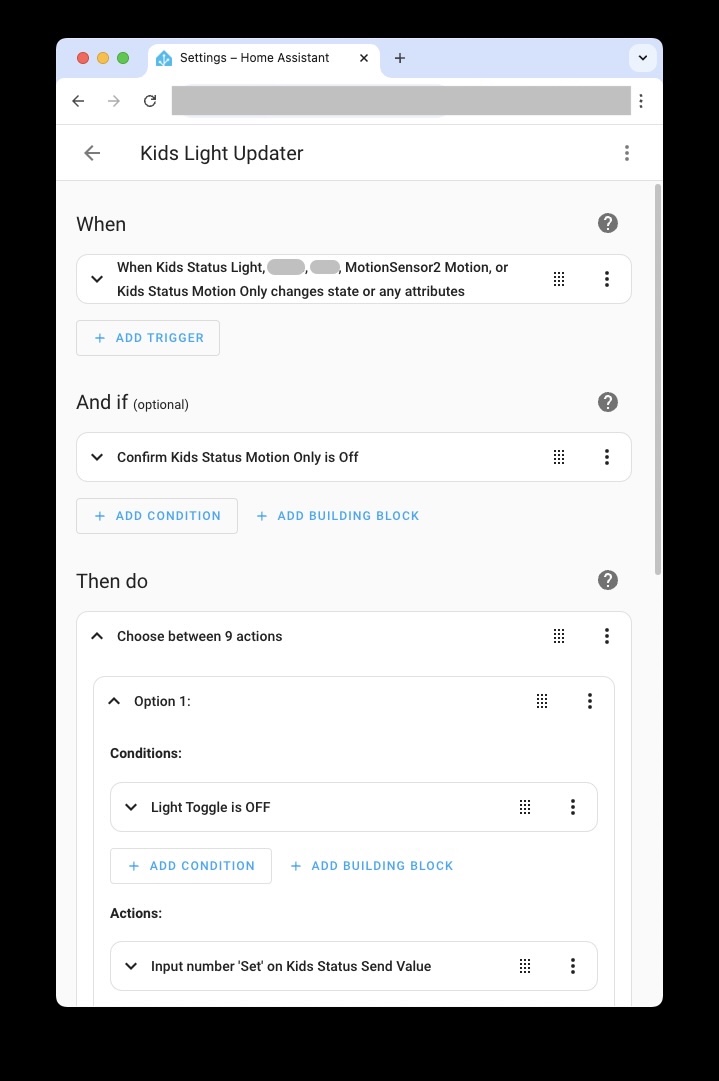 HA Automation HA Automation |
Notes:
I threw this together quick, so if anything doesn't make sense or you need some more detail, please reach out to me on Mastodon: @jamisonjudd@techhub.social